| ||||
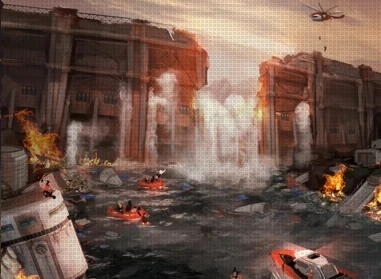 A disaster alarm is now imposed in Site 13. The optimized Turbines that were built into the Hydroelectric power plant without prior testing have developed a malfunction which has damaged the dam. A vast volume of water is now pouring through Thor Strindberg's city. And, as if that weren't bad enough, CEO Rufus Thorne has announced that he will be coming to review progress in your 2-year plan...
| ||||
| NPCs | Thor Strindberg, Rufus Thorne, Engineer Peterson | |||
| Multiplayer | not possible | |||
State of Emergency is the second mission in the First Chapter of the Campaign. This mission begins in the aftermath of the deluge caused by the dam bursting at the end of the last mission.
The first objective will be to rescue the survivors floating on the lifeboats. Just move the command boat to them to pick them up. Once all three lifeboats have been rescued, take them back to your islands' harbor. You will have to provide housing for them.
Rufus Thorne, your superior, will then ask you to provide 15 tons of Tools to a facility near the dam site. Now, of course, you could just buy them, but what's the fun in that? Therefore, E.V.E. guides you through land acquisition, upgrading your population, and finally, Tools production.
Your progress of your Island will be carried over into the next mission.
Main Objective[]
| MAIN OBJECTIVE The Emergency Plan | |
| |
|
| |
|
| |
| MAIN OBJECTIVE Damage Limitation | |
| |
|
| |
|
| |
Rewards[]
- 50 Career Points for the Tycoon faction
Walkthrough[]
| Recovery Survived! | |
| |
|
| |
|
| |
You start off seeing the remains of the broken Dam and a newly flooded Site 13. You first primary objective will be saving the people and goods. To that end, your first quest is teaching you how to pick up items in the water.
Navigate your ship to the marked position on the map (just south of Thor's Warehouse), and right-click to have your ship pick up the people. Once you have all three, return your ship to your Warehouse and Drop them inside by clicking on them in your ship.
- TIP: You can give your ship multiple commands at once by holding the shift key down. While holding down the shift key, right click all three Castaways and then right click your Warehouse, and you will see your ship carry out all the commands in the order of your clicks.
| LAYOUT Refugee Camp | |
| |
|
| |
|
| |
These life rafts were full of people and now we need more room on the Island. You should still have 15 houses from the last mission, so just add another 10 Worker Barracks and to your City Center.
| DELIVERY Emergency Equipment | |
| |
|
| |
|
| |
Rufus Thorne wants you to get an item from his ark, so take your ship over to pick up the sandbags.
While these specific items will likely never be seen again in game, what they teach you will be seen, and done, many times over. When you get the sandbags, they will automatically go in your activation slot instead of your inventory.
| EMERGENCY ASSISTANCE Drainage | |
|
Use the sandbags to protect three Goods depots in Site 13.
| |
|
| |
|
| |
At this point they want you to "use" the sandbags on each of the depots marked on your map. Move your ship up against the depot and then left-click to use the item. Its pretty much that simple!
- TIP: In most cases an activation will take quite some time to complete. Your ship will not be able to be used for anything else during this time, so keep that in mind when you need to do something like this again in the future.
| DELIVERY Goods Protection | |
| |
|
| |
|
| |
Navigate to Thor's Warehouse to receive the Oil. Then take your ship over to your Warehouse. By now these delivery missions should be becoming second nature. These are one of the largest types of quests you will see in the game.
Completing this will complete your first Main Objective! On to the second part: Trying to fix the Dam.
| LAYOUT Reconstruction | |
|
Create the right conditions so that Tycoon Employees settle in Alesta. For this you need:
| |
|
| |
|
| |
To fix the Dam we will need Tools, and this time we are going to learn how to produce them ourselves. To gain access to Tools Workshops you need at least one Tycoon Employee. To achieve this you need to meet all the needs of the Tycoon Workers in order for them to upgrade.
- TIP: For a guide on understanding Needs and getting your population upgraded, please make sure to check out that page!
If you click on one of you houses you will see that there are four things that they need in order to be able to upgrade: Food, Community, Drinks, and Activity. We are satisfying the first two thanks to the Fishery and City Center. Now we are going to satisfy Drinks.
Follow the build menus and the arrows on screen to navigate to the Distillery. Place it down near your Warehouse (or Depot if you built one).
- TIP: As you will notice as you place the Distillery, it has its own influence area. This is the radius that you will have in which to place down farm fields. Make sure to leave plenty of room on one side because you will need two 3x4-sized boxes to fit the farms.
Now click the newly placed building and you will see another arrow navigation showing you where to click to manually place farms. You can also auto place the farms by clicking the top left button on the interface, but this is not recommended since the game does not place them very efficiently. Lastly you can access the farm building option by clicking the farm button to the left of the production percentage.
- TIP: Rotate your farms to place them exactly how you want them to be (default: middle mouse button).
Once you have placed both farms down, connect the building to the Warehouse with a road.
- TIP: Farm fields do not need roads to function. So do not worry about connecting them with anything. As long as they are within the influence area of the building they are supplying they will function properly.
| DELIVERY A Spot of Luck | |
| |
|
| |
|
| |
It appears we do not have the Rice Fertility on this Island. Fear not! Rufus Thorne to the rescue! This is to teach you that if you have an open fertility on an island you can socket your Warehouse with a new one.
Receive the fertility from the ship, and open your Warehouse. Click on the Items tab at the bottom. The fertility should already be in one of the sockets for the Island, however it is not currently active. Activate it by left-clicking.
- TIP: Once active the only way to remove that item is by destroying it. Keep this in mind since you will not be able to move it to another Island later. Most other things can be freely moved around, but not Fertilities.
| LAYOUT Worker Motivation | |
| |
|
| |
|
| |
The last thing we need to satisfy is Activity. Follow the arrows to find the Casino. These buildings need to be placed near your houses since they too have an influence area. Try to place the building in a location that will encompass all of your houses, and then make sure it is connected to those houses with a road.
- TIP: The road does not have to stay within the influence area to count as "connected". There just needs to be a single stretch of road, in some way connecting the house to the building, in order for it to count.
We now have a Distillery making drinks, once your Warehouse receives the Goods; and your population should have their Activity Need met. You should soon see your population automatically start upgrading. For the first level of upgrades it will cost you 1t Tools for each residence.
- TIP: You can stop them from upgrading by clicking on your City Center and then clicking on the "Deny Ascension Rights" button in the top right. You can re-enable this option again at any time by clicking the same button again.
- TIP: You can speed up the upgrades by clicking the up arrow next to the appropriate population class inside the City Center interface. Holding the shift key while clicking will upgrade all available instead of just one at a time.
- TIP: If you deny ascension rights, your residences will only upgrade when you tell them to. This is useful if you don't want them using up your resources trying to upgrade, or if you don't want the extra drain on resources from the increased needs demand (Employees will use up more goods than Workers, simply because there are more of them inside one house).
- TIP: To allow your residences to upgrade if you decide to deny them, you may do so by either following the second tip and clicking the arrow inside the City Center interface or by clicking on individual houses ready to upgrade (shown by a green arrow over the house) and pressing the upgrade button in the top right of the House interface (or by pressing the default shortcut key: "U")
| LAYOUT The Goods Depot | |
| |
|
| |
|
| |
Now that we have at least 1 Employee, we have gained access to build the buildings needed to produce tools. This is also your first complex production chain. First we will need access to two mine sites. They have marked with arrows the two sites you need. Select the Depot from the Build menu. If this is your first time using this building you will see it has its own influence area. You will need to place it so it overlaps the Mine Sites. You will know it is close enough when the Mine Icon bounces up and down and turns green.
Cover both sites with one depot and on to the next quest.
| LAYOUT Supply of Tools | |
|
Ensure the supply of Building Materials.
| |
|
| |
|
| |
Time to build all the parts for our Production Chain. First, to make Iron, we need Coal and Iron Ore. For Tycoons, you actually have two methods to obtain coal, but we are learning about mine sites, so they want you to use a Coal Mine this time.
- TIP: Future reference 1 Coal Mine = 2 Rotary Excavators.
Once you have placed one of each mine we will then need to place down an Iron Smelter. Iron smelters will take in Coal and Iron Ore and output Iron.
- TIP: 1 Iron Smelter requires 1 Iron Ore Mine and 1 Rotary Excavator or half of a Coal Mine. So with our current setup you could support 1 more Iron Smelter, if you provide 1 more Iron Ore Mine.
Next, place down two Tools Workshops.
- TIP: 1 Iron Smelter can supply enough Iron for 2 Tools Workshops
Connect them all together with some roads and watch 'em go!
| DELIVERY Emergency Supply | |
| |
|
| |
|
| |
Once you have gathered 15t Tools inside your Warehouse, offload them onto your ship. Then move your ship up to the Dam, to turn in the quest.
Thus completes Mission 2 and a cut scene will lead you on into the next mission.
Video Walkthrough[]

Video Walkthrough by YouTube user Leafonthewin